Hello there readers! I don't have much time to post anything since the last post, and I apologize for that.
Anyway, going straight to the point, the kind fellows at Life Goes Strong linked to this humble blog of mine, so I'm here to return the favor: Go visit their tech section Tech Goes Strong for more tech news! They cover all sorts of tech ranging from computers, gadgets, and cars.
You can find them here: http://tech.lifegoesstrong.com/
Friday, September 16, 2011
Monday, July 18, 2011
How To Recover, Reset, Or Bypass Windows Passwords
There were times when you need to use a computer, only to be stumbled into a login screen which locks you out from getting into Windows. To make things worse, nobody else know the password. At this point, some people might already start considering to reformat and reinstall Windows.
Offline NT Password & Registry Editor can be downloaded here:
http://pogostick.net/~pnh/ntpasswd/
Method 3: Reset with PC Login Now
If text-based applications aren't your thing, fear not, this utility have a Windows-like interface which is simple to use. Just select the relevant options and hit next. The only downside is that the file is pretty large (about 60MB) compared to Offline NT Password & Registry Editor (about 5MB).
You can download PC Login Now here:
http://www.pcloginnow.com/
Method 4: Recover with Ophcrack
Ophcrack analyses Windows files and lists out the passwords for you. It does a pretty quick job at it (supposedly under 5 minutes) but will most likely work on alphanumeric passwords under 9 characters. Longer and complex passwords might take longer and is not guaranteed to be able to find the password.
You can install Ophcrack in Windows and Linux, but since you're stuck outside Windows you will need to use their LiveCD instead. They're pretty big, about 415MB (for XP) and 495MB (for Vista/7).
You can download Ophcrack LiveCD here:
http://ophcrack.sourceforge.net/download.php?type=livecd
Extra: Merging all tools into a CD/DVD or USB drive with XBOOT
You can combine all the four tools mentioned above (and many more) into a bootable USB drive or a DVD using XBoot. You will be given options what to boot when you boot the USB/DVD drive. Even comes with a virtual machine (QEMU) to test out the bootable drive.
You can download XBoot here:
https://sites.google.com/site/shamurxboot/download
Just a small note, right after you load Kon-Boot, it will return to the XBoot menu. To proceed to booting Windows, hit Esc, then type (without quotes) "chain.c32 hd1" and hit Enter. If that fails, you might want to change "hd1" to "hd0", "hd2", "hd3", etc. This should work as long as you use syslinux for it's bootloader.
Hopefully this post has been educational for you, but more importantly, useful for you. Drop some feedback please!
 |
| Curse you. |
But not all hope is lost. Given some knowledge, getting back access shouldn't take more than 15 minutes. And it doesn't really require a lot of computer skills. Any adventurous computer user should be able to do it themselves, provided they pay attention.
NOTICE: THIS LISTING IS PROVIDED AS-IS, AND SHOULD NOT BE USED FOR CRIMINAL PURPOSES. I DO NOT HOLD RESPONSIBLE FOR ANY DAMAGE YOU DONE WHILE USING THESE METHODS, BUT REPORTS ABOUT DAMAGES ARE EXTREMELY RARE IF THERE IS ANY, AND I'LL TRY TO HELP IF ANY DAMAGE WERE TO HAPPEN IN THE PROCESS. TRY TO MAKE A BACKUP WHENEVER POSSIBLE TO MINIMIZE DAMAGE.
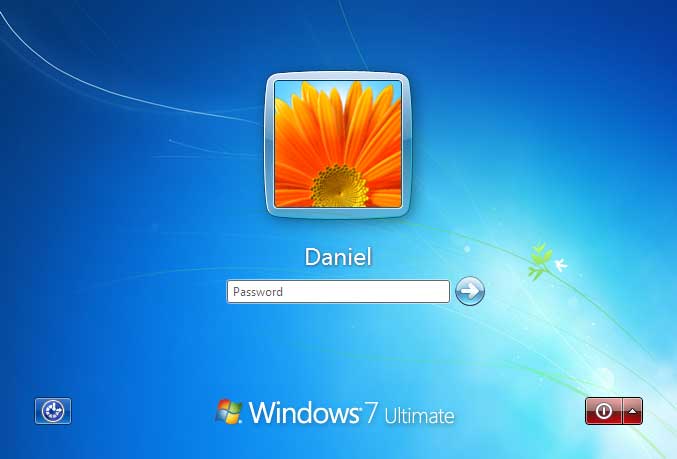
Method 1: Bypass with Kon-Boot
 |
| Fun Fact: The name Kon refers to a character in the popular anime Bleach who took the form of a lion plushie. |
Kon-Boot basically lets you bypass the password temporarily, leaving no traces behind. All you need to do is boot Kon-Boot first (via a bootable CD, floppy disk, or USB drive), then load Windows without restarting. Type any gibberish you want in the password field, hit Enter, and voila, you now have access. Restart the PC, and everything goes back to normal.
Kon-Boot comes in two flavors, the free version and the commercial version. The free version (maintained by Piotr Bania) is pretty much the older version, and only works with 32-bit Windows and some Linux distros. The commercial version (maintained by Kryptos Logic) works with both 32-bit and 64-bit Windows, but does not work with Linux distros.
You can get Kon-Boot here:
http://www.piotrbania.com/all/kon-boot/ (free version)
http://www.kryptoslogic.com/?area=2&item=2 (commercial version)
Method 2: Reset with Offline NT Password & Registry Editor
 |
| Okay, just take it slow and you'll be fine. |
This small utility will let you reset the password, making it a blank password, or just change it without knowing the original password. However, the utility might seem overwhelming at first, as it was text based, but all the instructions and guides are there to help you. Read them carefully and you shouldn't encounter too many problems. You can see it in action:
Offline NT Password & Registry Editor can be downloaded here:
http://pogostick.net/~pnh/ntpasswd/
Method 3: Reset with PC Login Now
 |
| Finally! Something to click on! |
You can download PC Login Now here:
http://www.pcloginnow.com/
Method 4: Recover with Ophcrack
 |
| This is why you need strong passwords. |
You can install Ophcrack in Windows and Linux, but since you're stuck outside Windows you will need to use their LiveCD instead. They're pretty big, about 415MB (for XP) and 495MB (for Vista/7).
You can download Ophcrack LiveCD here:
http://ophcrack.sourceforge.net/download.php?type=livecd
Extra: Merging all tools into a CD/DVD or USB drive with XBOOT
 |
| You can even put just about anything bootable here. |
You can download XBoot here:
https://sites.google.com/site/shamurxboot/download
Just a small note, right after you load Kon-Boot, it will return to the XBoot menu. To proceed to booting Windows, hit Esc, then type (without quotes) "chain.c32 hd1" and hit Enter. If that fails, you might want to change "hd1" to "hd0", "hd2", "hd3", etc. This should work as long as you use syslinux for it's bootloader.
Hopefully this post has been educational for you, but more importantly, useful for you. Drop some feedback please!
Monday, May 30, 2011
Accessing Linux Partitions In Windows
Lately I've been booting back and forth between Ubuntu and Windows. This time, I installed Ubuntu on a separate partition, instead of using Wubi. However, Ubuntu's default filesystem is EXT3, which is not accessible through Windows.
With the help of 3rd party software, you can. There are many out there, but so far these two works for me.
ext2explore

ext2explore is a standalone program, requiring no installation. Good for occasional use. It will automatically detect your EXT2/3/4 partitions, and can extract files from that partition. However, it's read-only, so you can't copy files into that partition with this program. Very simple to use. You can download it here:
http://sourceforge.net/projects/ext2read/
ext2fsd

ext2fsd allows EXT2/3/4 support from within Windows, but like ext2explore, it's read-only. Trying to modify or create files from EXT partitions will generate an error. Still, it works seamlessly, you can copy your files, or open the files in another software without extracting them out. You can download it here:
http://sourceforge.net/projects/ext2fsd/
Monday, May 23, 2011
Speed up your Internet: Find a better DNS
UUOOOO WARP SPEEEEEEEEEEEEEEEEDD
Introducing DNS Benchmark.
 |
| Graphs makes it easy to see which one works best |
The software is in fact very straightforward to use, all you need to do is go to the 'Nameservers' tab and click 'Run Benchmark'. It doesn't take very long to see which one is better, out of the many public DNS out there. In most cases, I find that Google Public DNS is often the fastest.
But after you run the benchmark, you can do a full DNS benchmark, looking for even more DNS to benchmark, including little known ones. It is said to improve your connections even further. By how much, well, that depends on the conditions.
Also, by using a different DNS, you can bypass some filters which your ISP has blocked for some reason. Which is good, I think.
You can get this software for free at this website:
OK, so I've benchmarked it. What else should I do?
You have to change your DNS settings according to your benchmark results. This site should assist you, just remember to substitute the DNS with your benchmark result:
Subscribe to:
Posts (Atom)